Use of an Emlid Reach RTK GNSS
Here’s a collection of tips, best practices and tutorials for using Emlid Reach RTK GNSS. We use the RS+, M+ and M2 models, either as a base or as a rover. The antennas can be single-band or multiband, and in particular the single-band model used here is a Tallysman TW4721 antenna.
Get started and connection behaviors
To get started for the first time, simply follow the tutorial provided by Emlid, which is fairly intuitive. However, some hardware behaviors are not detailed in the documentation or in the official forum.
Connection error with mobile data
To connect as a Wifi client using your phone’s Emlid application to an Emlid GPS-RTK access point, you need to turn off your mobile data before establishing the connection in order to detect it.
Blocking Wi-Fi networks in client mode
On start-up, Reach enters a network search state (client) in which it will try to connect to all known Wi-Fi networks it can find. This may mean connecting in client mode to a previously added network, or, if none is found, creating its own network in access point mode. So you could find yourself stuck with your GPS connected in client mode to a Wi-Fi network, but unable to communicate with it on that network. You therefore need to isolate the GPS from the network by moving it further away or using a Faraday cage.
Blocked startup in time sync mode
When certain RTK M+ modules are started up indoors or in areas with no GPS signal, they get stuck in “time sync” mode, with the green LED flashing slowly: their Wi-Fi is on, but it’s impossible to access the GPS configuration page or collect data. You therefore need to receive a GPS signal for at least a few seconds in order to synchronize, and skip this start-up step.
Identifying the IP address of an Emlid Reach
If the GPS is connected to a wifi network and you want to know its IP address, simply connect your phone as a client with the application to the same network. Alternatively, you can use your phone as an access point, and connect the GPS to it. Please note that when the phone is restarted, the IP address assigned to the GPS will of course change.
Parameters configuration and recommendations
GPS parameters can be modified by accessing a configuration interface via a web page by typing the GPS IP address, e.g. 192.168.42.1 in direct connection, or via the Android application on your phone. Here you will find the various sections for configuring Emlid Reach GPS units.
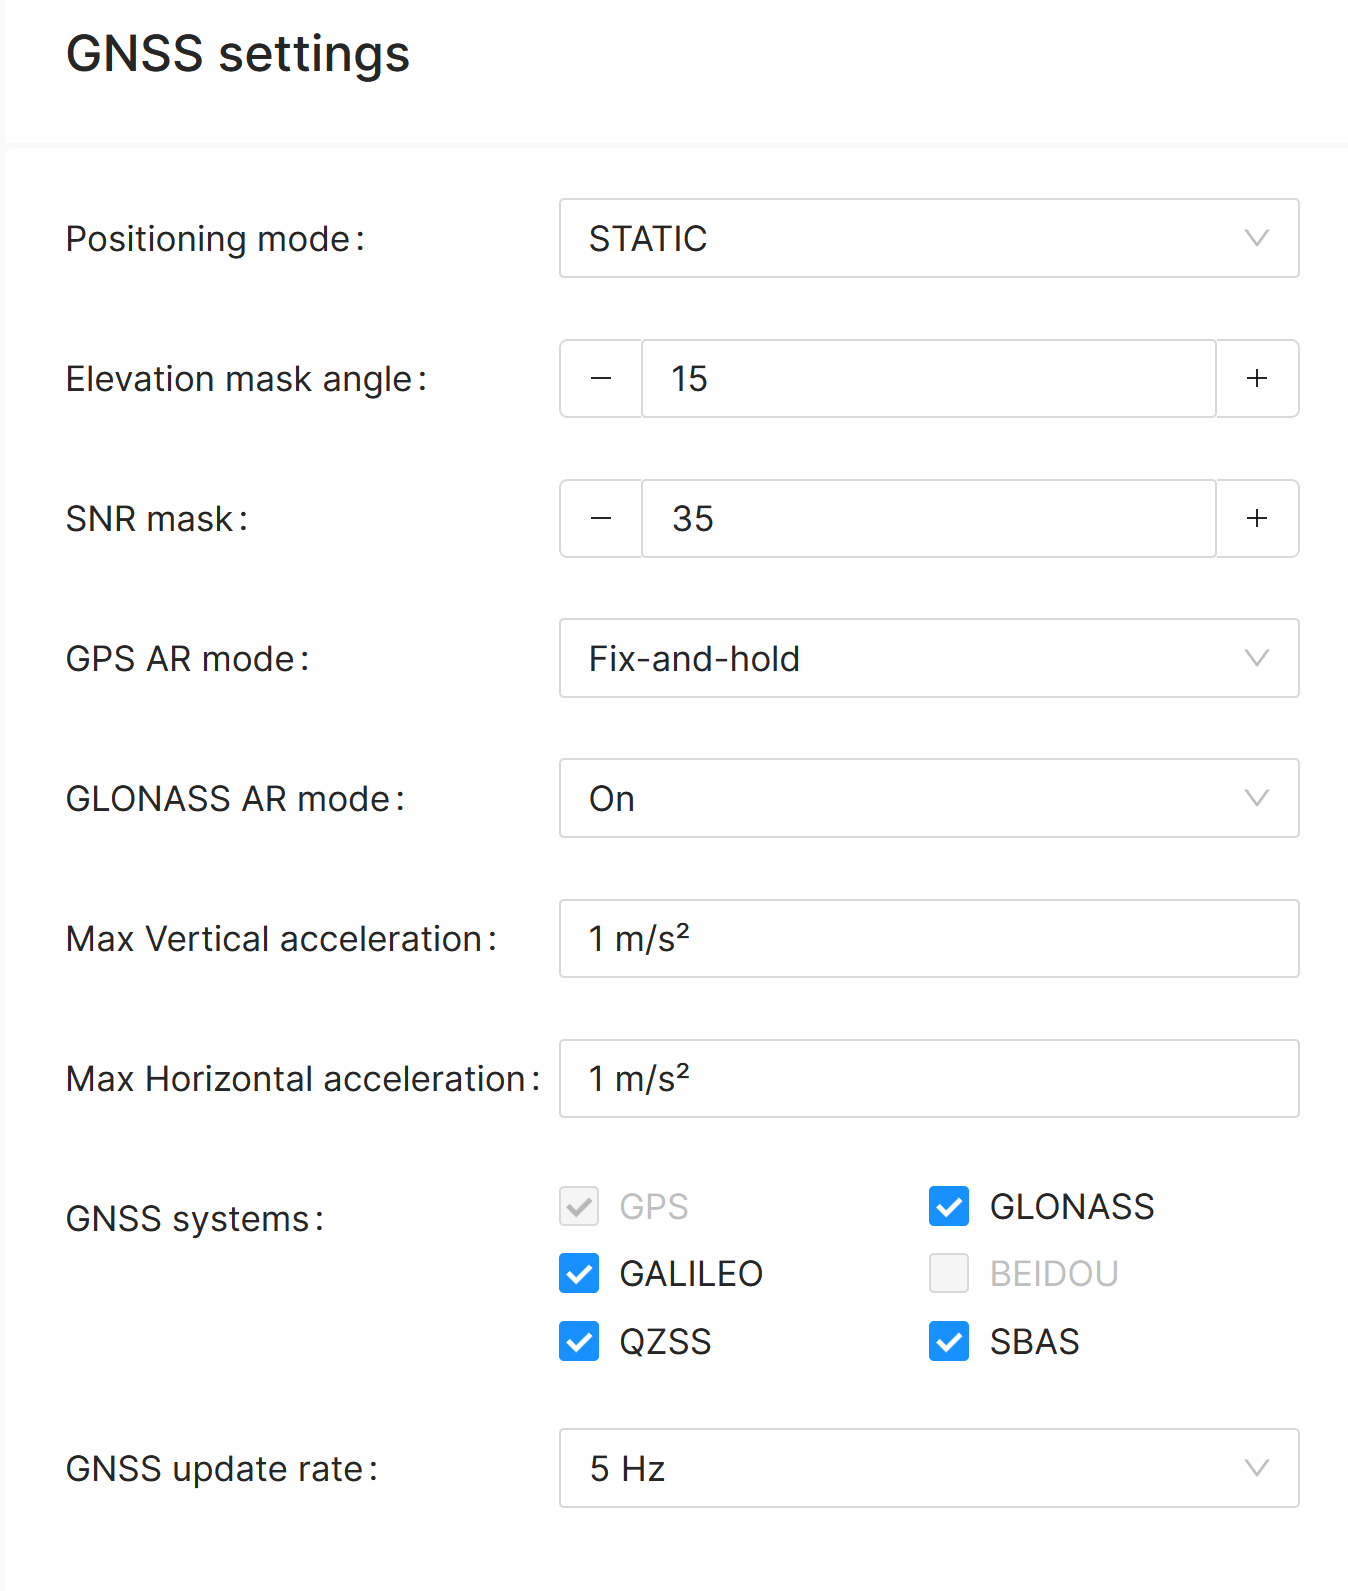
GNSS settings
Compared with the manufacturer’s default values, we’re using an RS+ as a base, which is why we’ve set the Positioning mode to Static, as the base will remain fixed: this will enable positioning calculations to be resolved more quickly and efficiently. Also for bases and rovers, it is recommended that for single-band GPS (RS+ and M+) the GLONASS AR mode be set to On.
The maximum GPS update rate is 14 Hz for RS+ and M+, and 10 Hz for M2.
Important
For RS+ and M+, if you choose to receive the GLONASS and/or BEIDOU constellation, you can only have a maximum rate of 1 Hz or 5 Hz.
Here are our recommended configurations, using an RS+ as a fixed base, and rovers with M+ and M2.
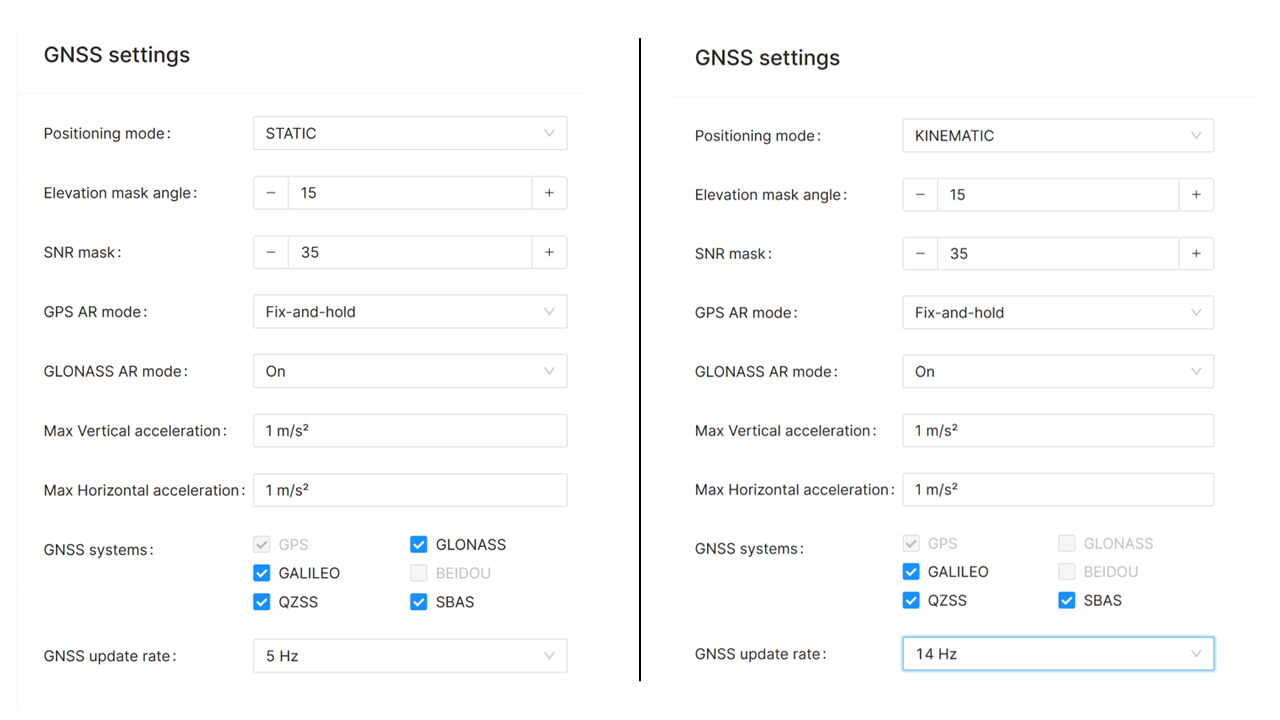
Emlid Reach RS+ in base mode and Emlid Reach M+ in rover mode.
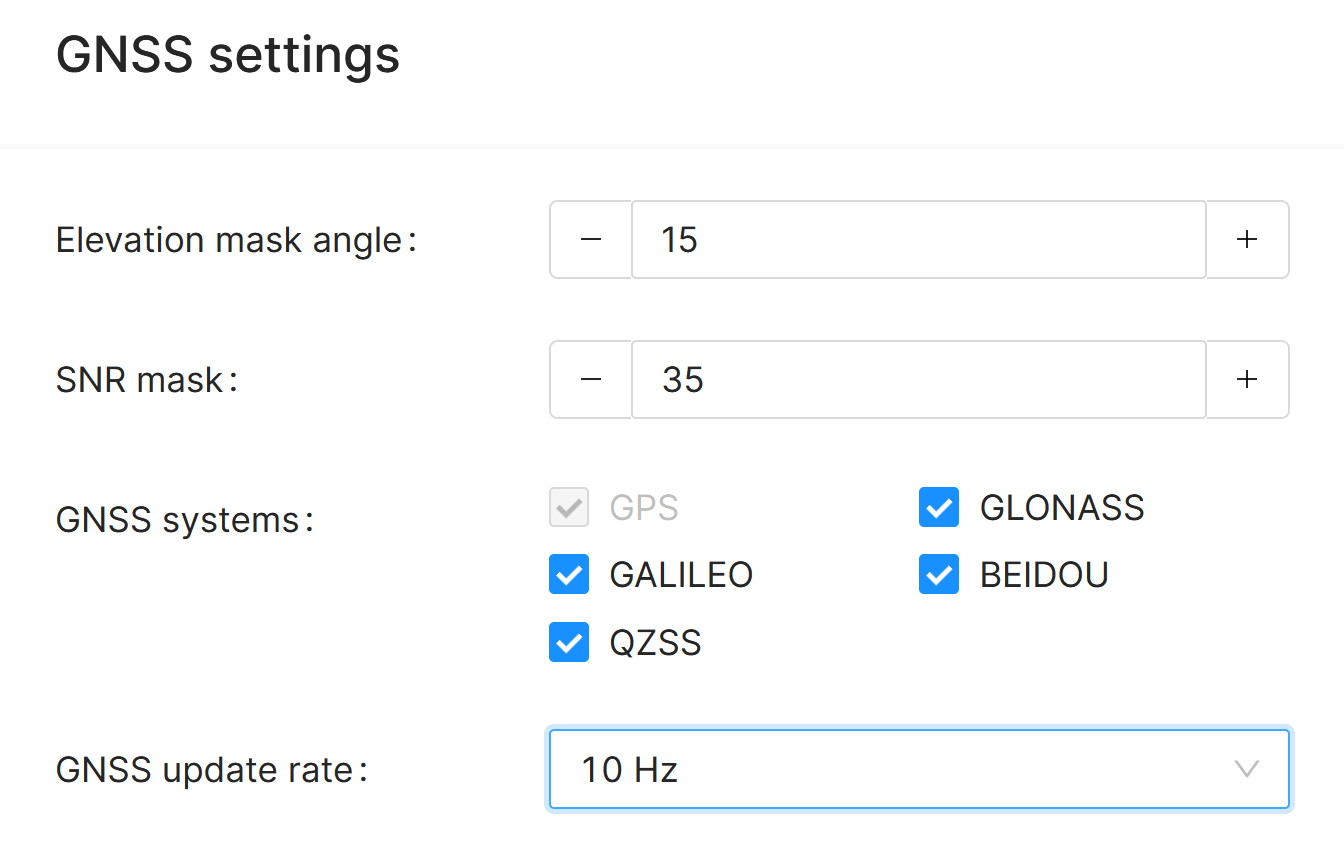
Emlid Reach M2 in rover mode.
Correction input
The correction format is RTCM3. For the base station, there’s no need for incoming correction, but we can connect it to a fixed station via NTRIP over the Internet if we want a closer reference point for our system. The rovers can receive correction from our own base via LoRa, but also via Wi-Fi (TCP server and client), USB and Bluetooth.
We can also use NTRIP’s internet service with bases located in the region, thanks to RTK2go for international use, or CentipedeRTK as a French solution, which is also international. For the mount point, we need to check the respective NTRIP websites to see which base is closest to our area of operation.
Note
To use RTK2go, enter the address rtk2go.com with port 2101, and leave username and password blank. You must, of course, enter the nearest mount point.
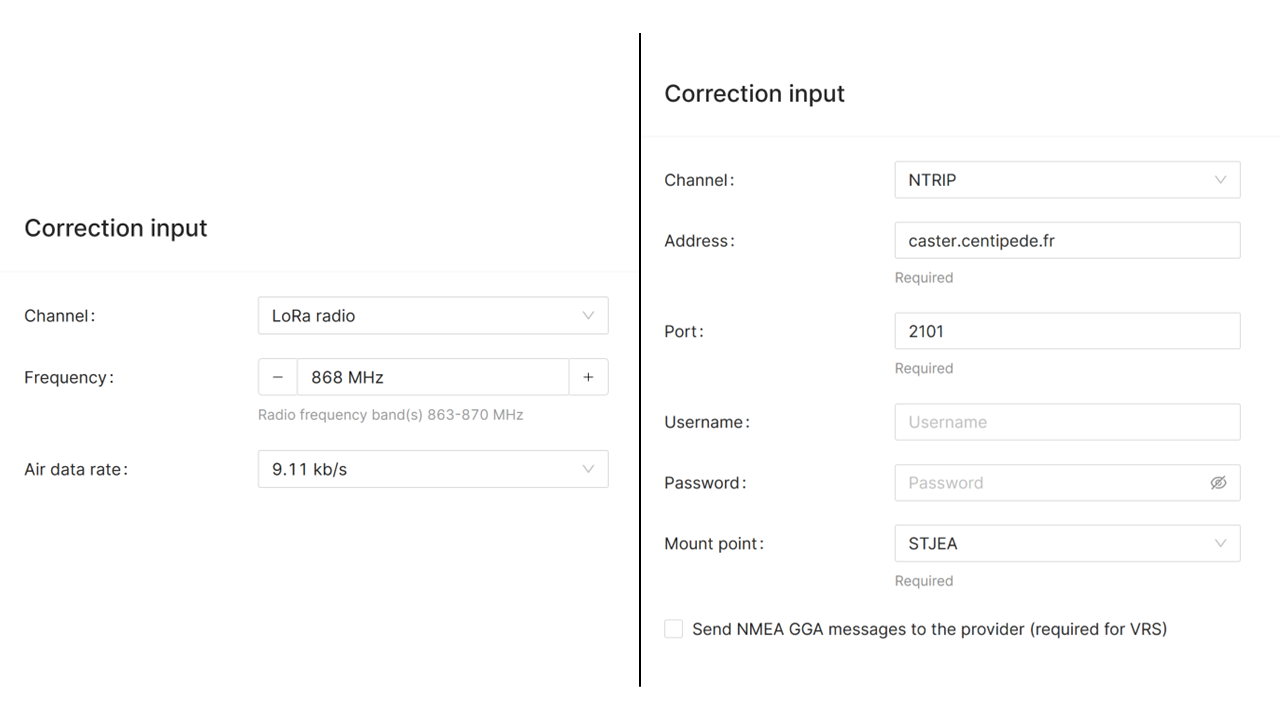
Settings for a Rover receiving correction via LoRa on the left, and via NTRIP on the right.
Base output
This setting should of course be deactivated for GNSS receivers acting as rovers, preferably for the M+ and M2. We prefer to use the RS+ as a more practical base unit, with its battery and practical mountings.
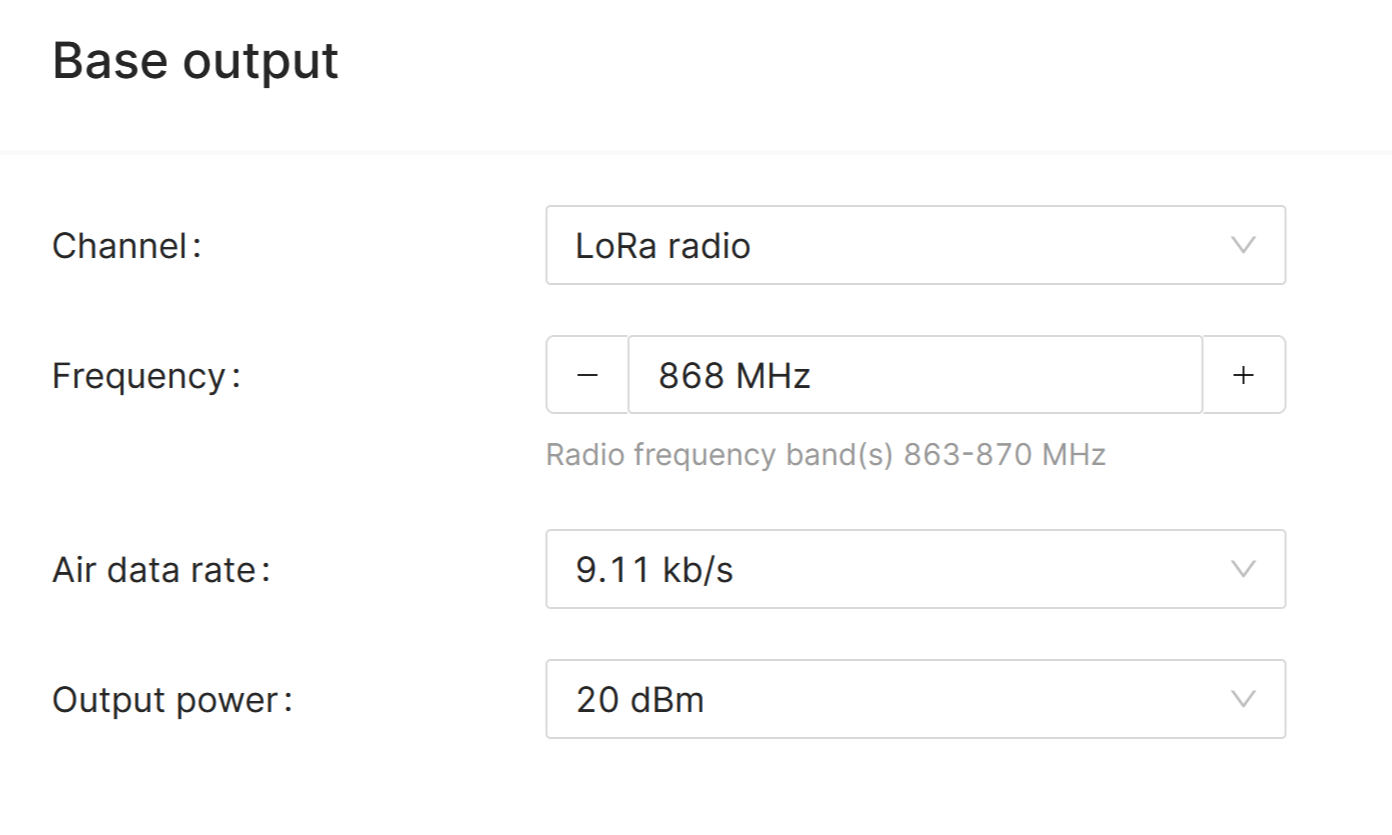
Parameters for our RS+ base sending the correction via LoRa.
Base settings
We want to use an Emlid Reach RS+ receiver as a base. The size of the GPS between the bottom of the plastic protective case and the GNSS receiver located in the center of the case is already taken into account, which is 0.065 m for information.
Parameters for an RS+ base.
Position streaming
First of all, for the receiver acting as a base (the Reach RS+), there’s no need to receive its position via streaming, as the RTK correction is sent by LoRa from the base to the rover, and can thus be retrieved by the rover. For rovers, data can be retrieved via two outputs called Position Streaming. With Wi-Fi, NMEA format can be obtained on output 1, and ENU format on output 2, see image below. For wired USB, only one output is available.
We prefer to collect all data on a single USB output, directly wired to an on-board computer, to avoid data loss and limit the number of wifi connections in the HMAS system. We select GGA for latitude, longitude and altitude, RMC for speed and heading, and EBP to retrieve the base position. An example of the output format and justifications for the recovered data can be found in our research project thesis.
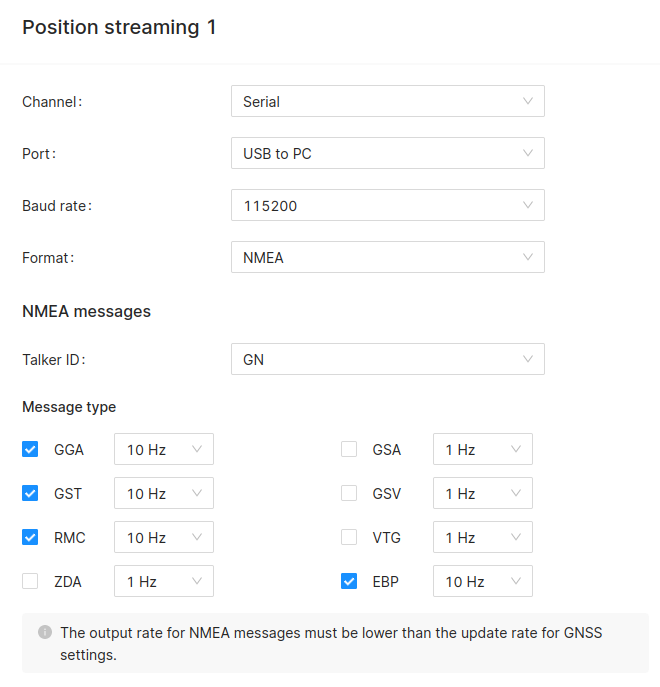
Parameter in USB mode in NMEA format.
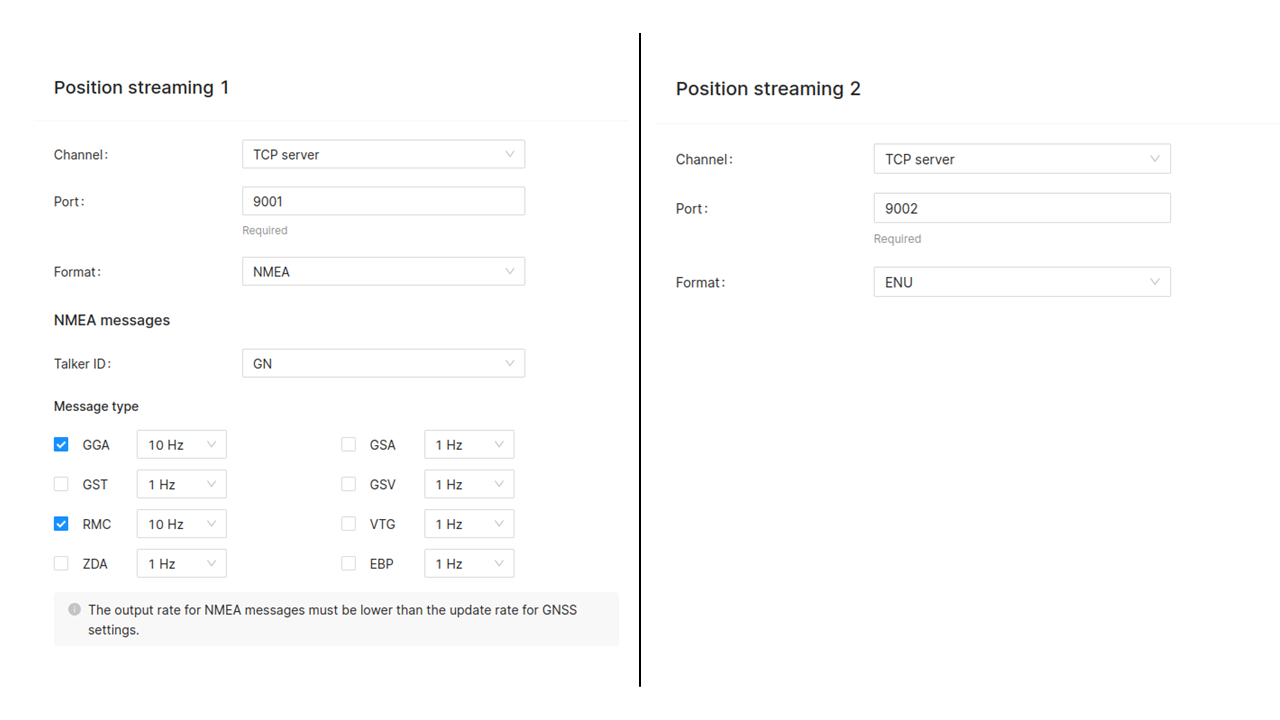
Parameter in Wi-Fi mode with the first output in NMEA format and the second in ENU format.
Note
In the GST frame in NMEA format, the deviations observed are the same values (called errors) as those displayed by the official Emlid mobile application, and also for deviations provided for output in ENU mode.
Bluetooth
We recommend disabling Bluetooth to save battery power and power consumption.
Bad environmental conditions impacting GNSS reception
In addition to problems connecting and starting RTK GPS, GNSS reception may not be sufficient, despite correct parameter settings. GNSS antennas need to be placed in a good environment, especially monoband antennas. However, it is still possible to achieve sufficient reception despite difficult conditions, and fairly good pre-precision even without a fixed solution. This is shown in the image below with two Emlid Reach M+, where sufficient accuracy is achieved despite poor reception, but the second RTK GPS is unable to calculate a solution. More details can be found in the thesis of this research project.
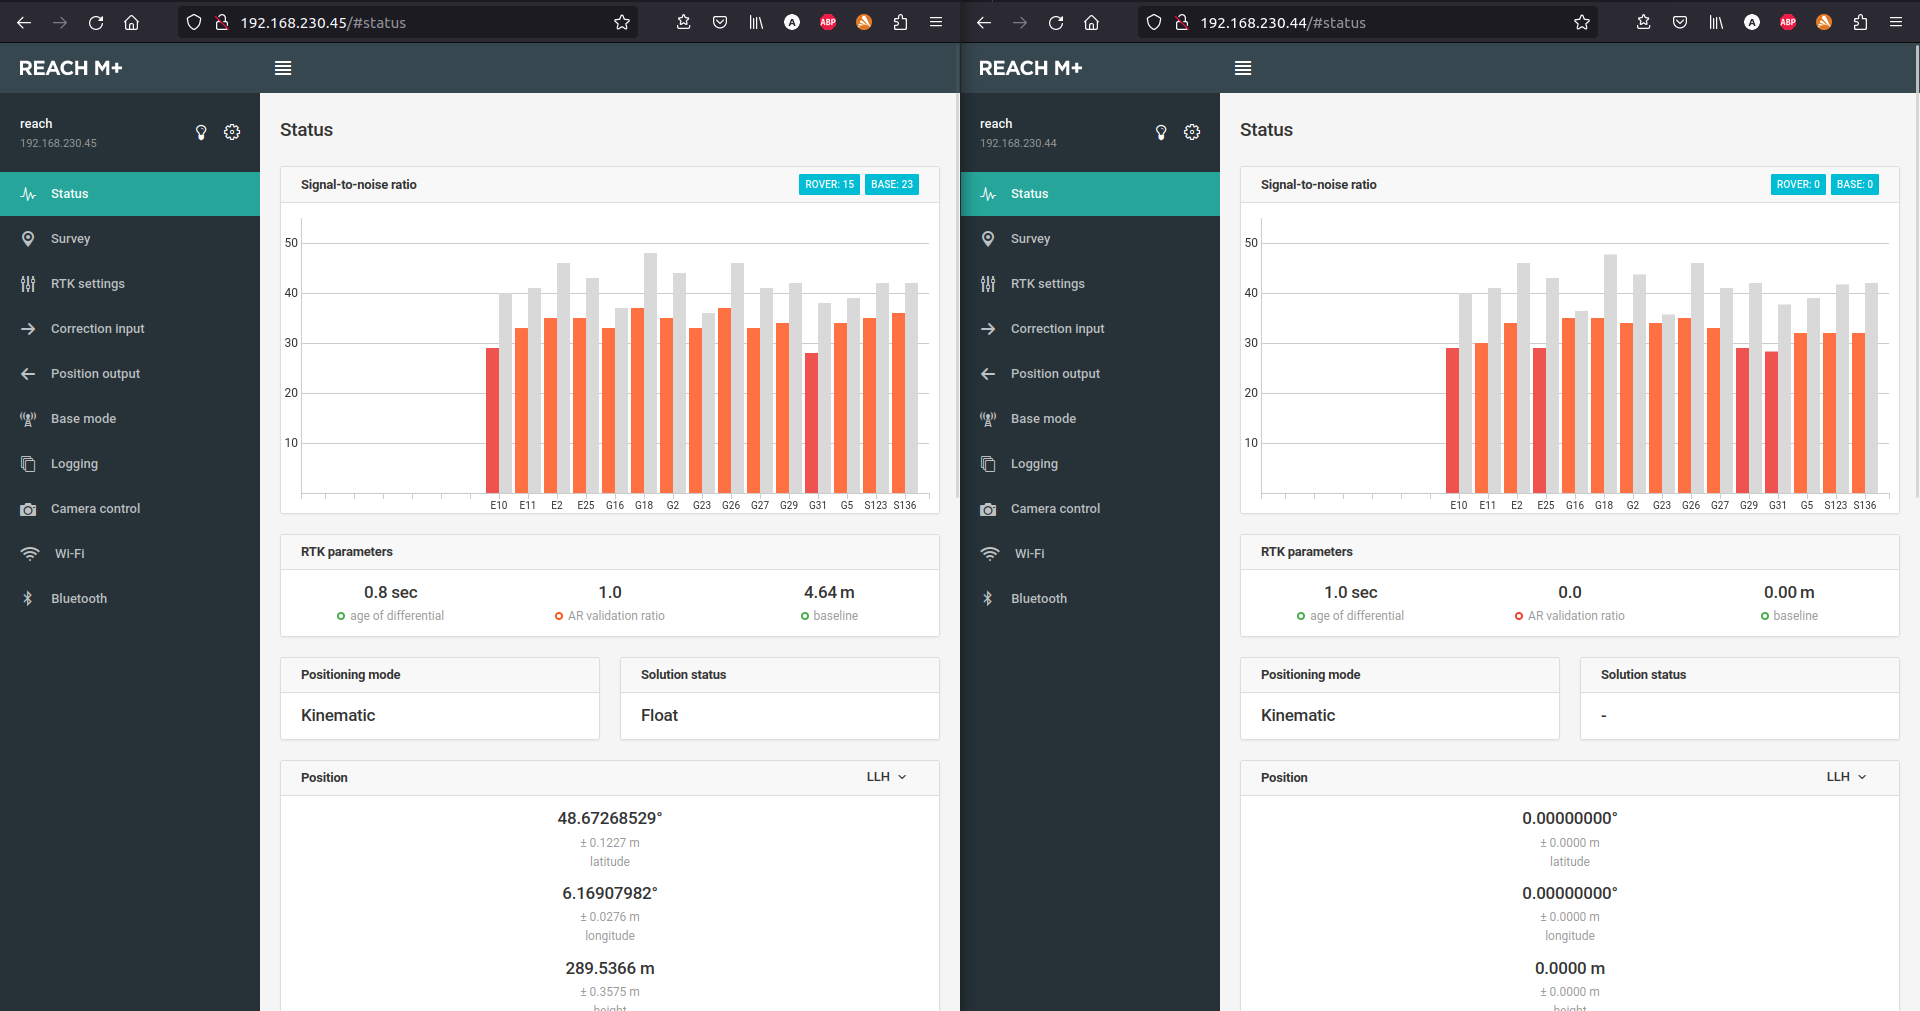
Firmware interface for Emlid Reach M+, single-band RTK GPS. Two receivers are displayed in difficult conditions, the first with a calculated solution, but not for the second.