NAPS: high precision indoor positioning
Writing in progress…
get started
Explication du démarrage de SteamVR et du matériel, avec quelques astuces
Quelques astuces de Steam pour minimiser l’erreur de tracking des bases
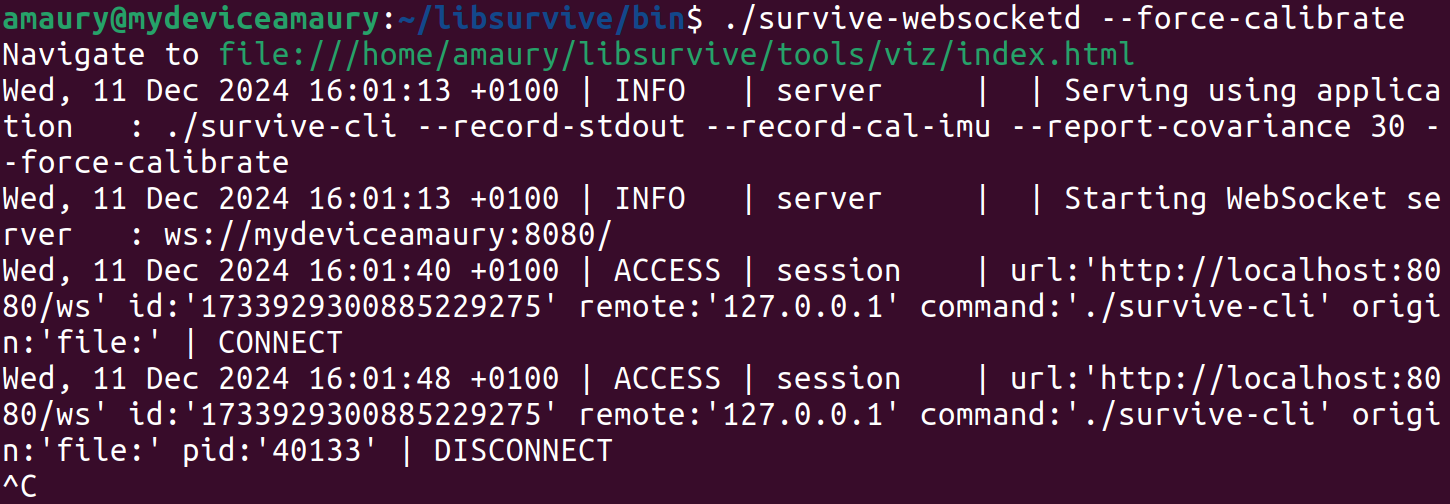
With Libsurvive, when you use the command ./survive-websocketd --force-calibrate:
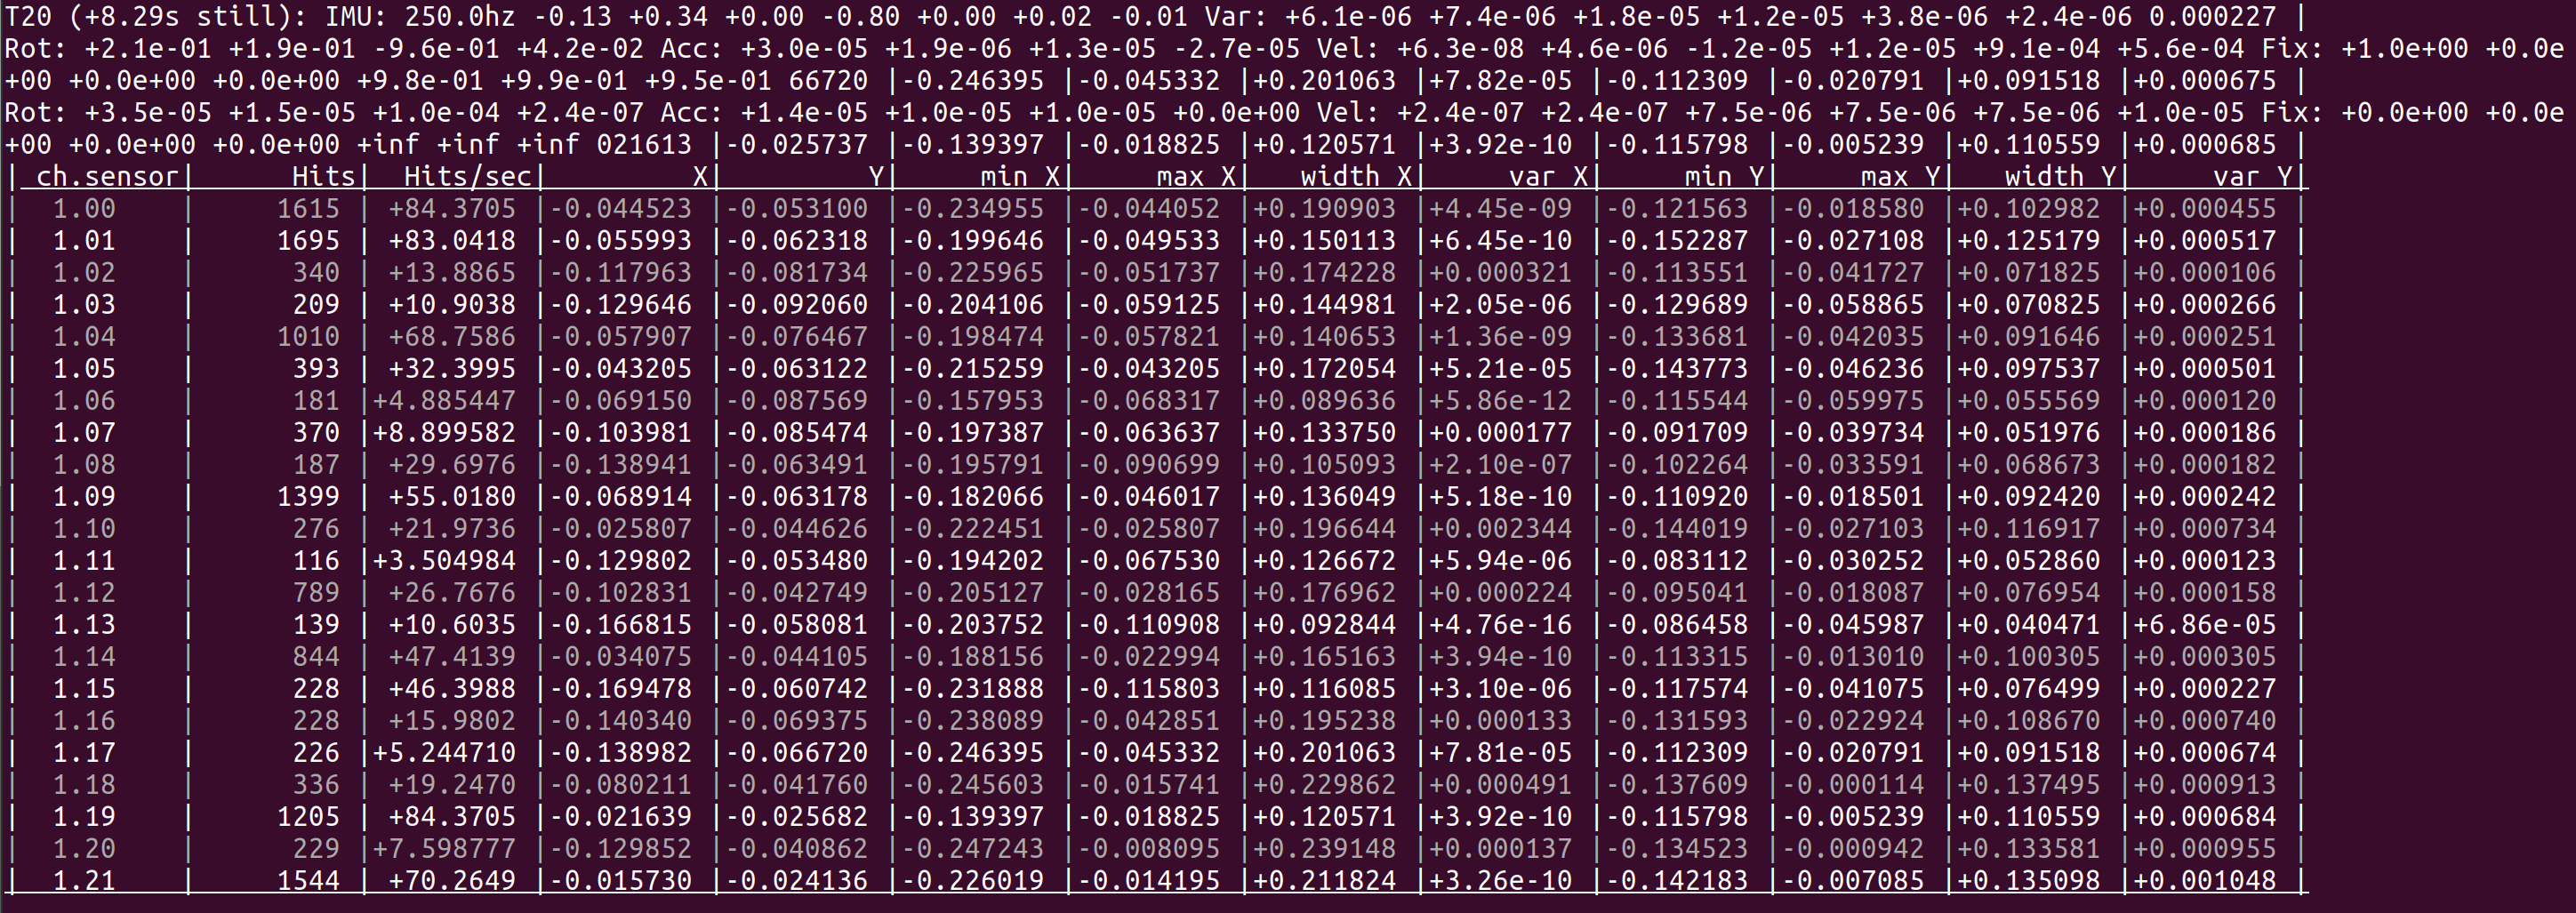
With Libsurvive, when you use the command ./sensors-readout, with the tracker connected to your computer and an operational base station, this will display sensors detected by the lighthouse, with 22 chanels (0 to 21).
Matériels
All the documentation on VIVE hardware is available, in particular on trackers and base stations.
Here’s a website to compare the features of the two Lighthouses used, the 2019 one and the old 2018 one.
Detection range and use of multiple Lighthouses
With SteamVR and Libsurvive, you can use several Lighthouses: 2, 3 and 4. We haven’t tested for more than 4. You can switch on the Lighthouses before the trackers, i.e. at initialization, to add them to your system. You can also add them as you go along, as the tracker will detect them and add them during runtime.
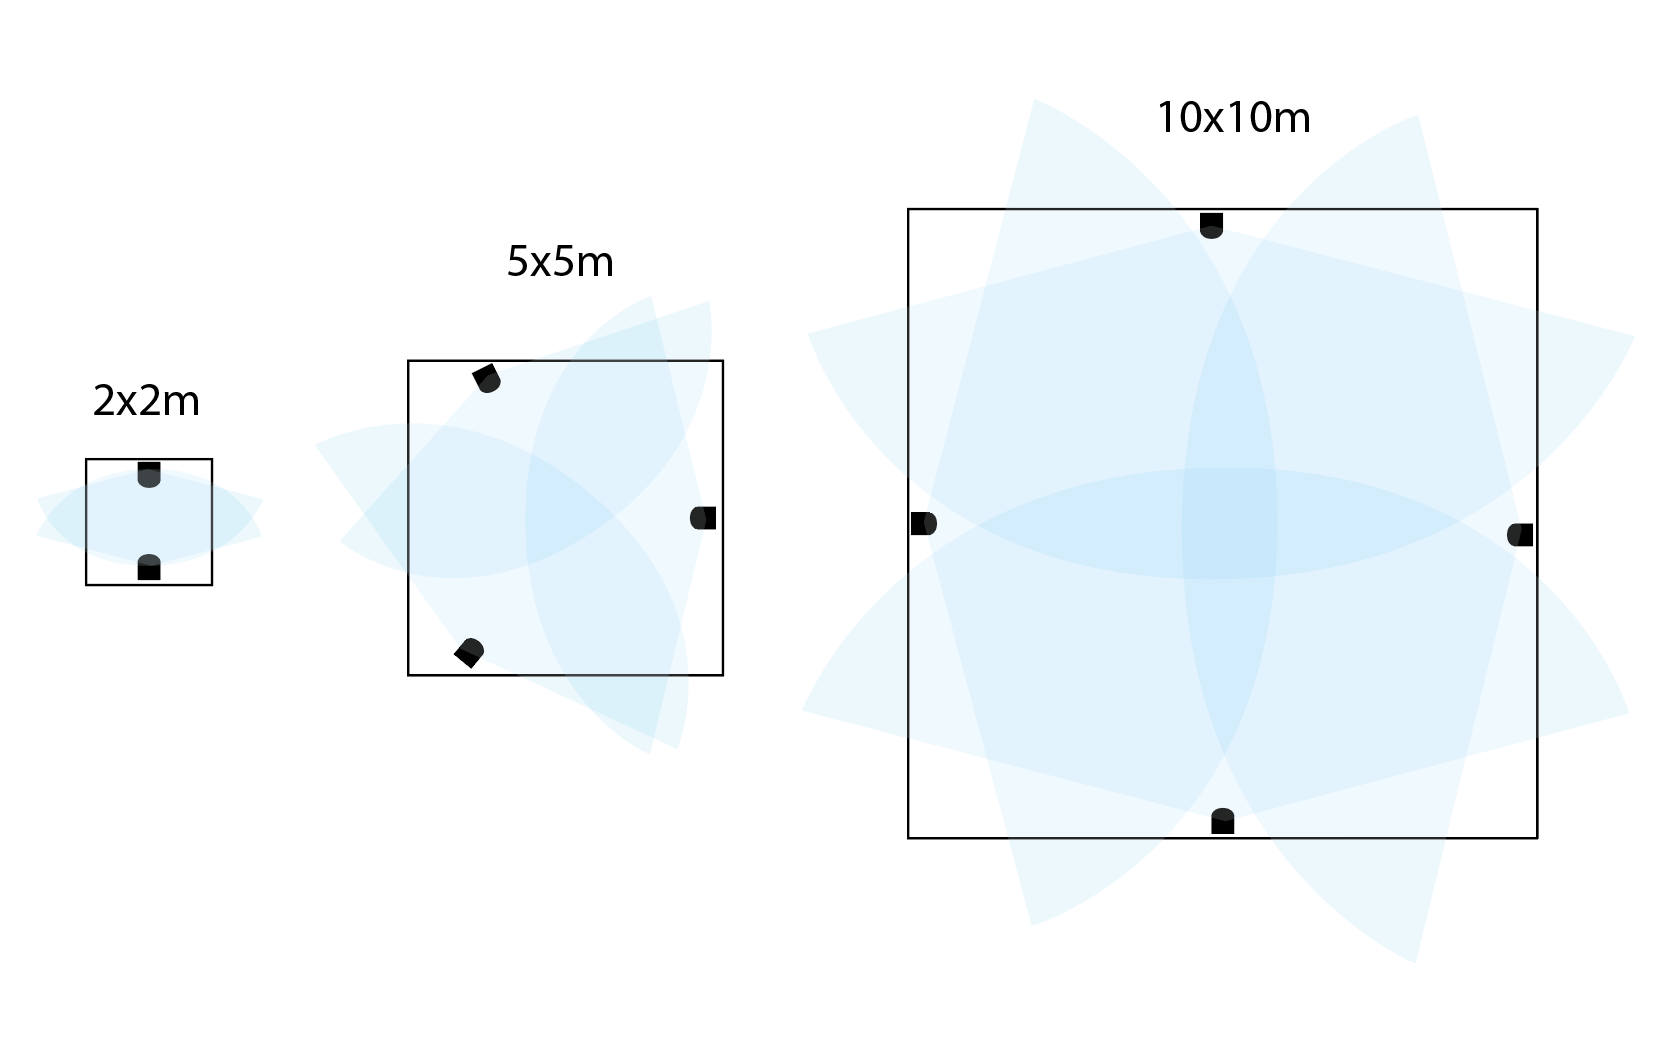
For classic use, we can create a game area, depending on the number of Lighthouses (see image). For an application where you want to move the lighthouses around, as with NAPS, don’t forget to recalibrate the system each time you move a lighthouse.
Warning
The main problem is that two Lighthouses may have the same name, creating a conflict in the system. You therefore need to change the channel of a base station, see in a next sub-section.
Switching on / off
To switch on, briefly press the central button for 1 second, and to switch off for 5 seconds. The tracker switches off automatically if :
The association has expired after being inactive for more than 30 seconds.
No movement has taken place for more than 5 minutes.
The tracker operates via USB cable, even if not pre-charged.
Pairing tracker
To link the tracker via SteamVR:
Click on the arrow logo, then select Devices > Associate controller. If you see a gray tracker logo, you can also hover the mouse over it and select Associate controller.
Press the Power button for about 2 seconds.
The status light flashes blue when association is in progress. The status light turns green when the VIVE Tracker (2018) is successfully associated.
Pairing dongles
Each dongle is paired with a specific tracker by default. There is a procedure for pairing them if necessary, but it seems that you need to use the VR headset to do so.
Modify a Lighthouse channel
We’d like to modify the channels and therefore the name of a Lighthouse to avoid conflicts. To do this, we need to go through SteamVR, go to the settings and modify the channels [Devices > Base station settings]. However, this can only be done via Bluetooth, so we need to connect an HTC VIVE headset to the PC, using a link box (HDMI, USB and power). The headset can remain in standby mode. Next, the SteamVR application asks you to install the Bluetooth driver. There’s no need to activate your computer’s Bluetooth, as we’ll be using the headset’s own. By plugging in the tracker, which is detected by the Lighthouses, we can finally configure the base station channels via the settings. More details here.
Update all peripherals
The VR headset needs to be connected to the PC with a link box, and a tracker (usb or dongle) detected by the lighthouses. Update via SteamVR in Settings.
Controller
The controller can be detected by SteamVR and Libsurvive, but Libsurvive can only display its sensors, not its position: a “bisambiguator” error. Similarly, in SteamVR, controllers are detected and associated, but not tracked by base stations.
Controllers don’t need to be connected via USB, they communicate via Blutooth to the headset. So to use the controllers and retrieve their positons, it seems necessary to connect a headset to the PC.
To associate the controller, press and hold the two small buttons, and the LED will flash blue.
Remarks
The 22 sensors of the tracker are located in the circular shapes of the protective shell.
For the base station, a connection is not required for functioning, as their positions are determined and collected by the trackers.
When the tracker is fully charged, its status light is either white if switched off, or green if activated.